PbTimes 情報誌
TinyMCEの設置方法、機能の紹介 - WYSIWYG
TinyMCEの設置方法と機能を紹介します。
概要
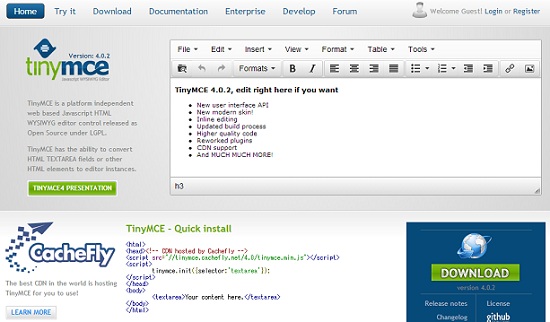
TinyMCEとはJavaScriptで作られた、プラットフォームに依存しないWebベースのWYSIWYGエディタです。
高機能であり、Wordpressでも使用されているプラグインです。
WYSIWYGとは「見ているものが手に入る」という意味であり、作成・編集時にディスプレイ上で見ているものがそのままHTMLコードとして出力することができます。
GUI操作で、文字の大きさ色の変更、画像の挿入、テーブルやリストの作成など様々なデザインを行うことが可能で、それをHTMLコードとして出力します。
WYSIWYGを使用することでHTMLが分からない人でも、ある程度のデザインができ、HTMLコードを生成することが可能になります。
そのWYSIWYGの中でも特に人気で、優れているプラグインがTinyMCEです。
まずはダウンロード
まずはこちらから、TinyMCEをダウンロードします。
ダウンロードしたTinyMCEを解凍してルートディレクトリ内に配置します。
いきなりサンプルコード
説明より先に、サンプルコードを見てみましょう。
JavaScript
<script type="text/javascript" src="jscripts/tiny_mce/tiny_mce.js"></script>
<script type="text/javascript">
	// Default skin
	tinyMCE.init({
		// General options
		mode : "exact",
		elements : "elm1",
		theme : "advanced",
		plugins : "autolink,lists,pagebreak,style,layer,table,save,advhr,advimage,advlink,emotions,iespell,insertdatetime,preview,media,searchreplace,print,contextmenu,paste,directionality,fullscreen,noneditable,visualchars,nonbreaking,xhtmlxtras,template,inlinepopups,autosave",

		// Theme options
		theme_advanced_buttons1 : "save,newdocument,|,bold,italic,underline,strikethrough,|,justifyleft,justifycenter,justifyright,justifyfull,styleselect,formatselect,fontselect,fontsizeselect",
		theme_advanced_buttons2 : "cut,copy,paste,pastetext,pasteword,|,search,replace,|,bullist,numlist,|,outdent,indent,blockquote,|,undo,redo,|,link,unlink,anchor,image,cleanup,help,code,|,insertdate,inserttime,preview,|,forecolor,backcolor",
		theme_advanced_buttons3 : "tablecontrols,|,hr,removeformat,visualaid,|,sub,sup,|,charmap,emotions,iespell,media,advhr,|,print,|,ltr,rtl,|,fullscreen",
		theme_advanced_buttons4 : "insertlayer,moveforward,movebackward,absolute,|,styleprops,|,cite,abbr,acronym,del,ins,attribs,|,visualchars,nonbreaking,template,pagebreak,restoredraft",
		theme_advanced_toolbar_location : "top",
		theme_advanced_toolbar_align : "left",
		theme_advanced_statusbar_location : "bottom",
		theme_advanced_resizing : true,

		// Example content CSS (should be your site CSS)
		content_css : "css/content.css",

		// Drop lists for link/image/media/template dialogs
		template_external_list_url : "lists/template_list.js",
		external_link_list_url : "lists/link_list.js",
		external_image_list_url : "lists/image_list.js",
		media_external_list_url : "lists/media_list.js",

		// Replace values for the template plugin
		template_replace_values : {
			username : "Some User",
			staffid : "991234"
		}
	});
</script>
HTML
<form method="post" action="index.php">
	<textarea id="elm1" name="elm1"></textarea>

	<input type="button" name="button" value="button" onclick="alert(tinyMCE.get('elm1').getContent());" />
	<input type="button" name="button" value="insert" onclick="tinyMCE.get('elm1').getContent() = test;" />
	<input type="submit" name="save" value="Submit" />
	<input type="reset" name="reset" value="Reset" />
</form>
画面イメージ
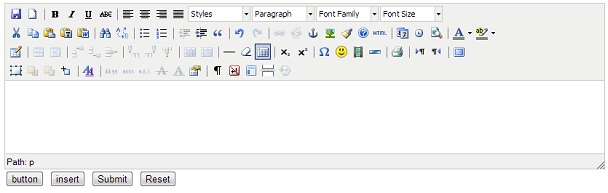
サンプルコード説明
まずは、tiny_mce.jsを読込みます。
基本的には、このjsファイルを読込むだけで動作します。
<script type="text/javascript" src="jscripts/tiny_mce/tiny_mce.js"></script>
そして、tinyMCE.initを記述していきます。
まずは、modeについてです。
よく使うのは、textareasとexactです。textareasはすべてのtextareaに設定する場合にしようします。
一方exactは設定したいtextareaのidをelementsで指定します。
mode : "exact",
elements : "elm1",
themeでは、simpleまたはadvancedを指定します。simpleを設定した場合は、限られたボタンのみ表示されます。
advancedを指定した場合は、各種ボタンやプラグインを自由に追加することができます。
theme : "advanced",
プラグインやボタンの追加・設置は、plugins、theme_advanced_buttons1~4で設定します。
また、以下の項目を指定することで、ツールバーの場所やリサイズの可否なども設定できます。
theme_advanced_toolbar_location : "top",
theme_advanced_toolbar_align : "left",
theme_advanced_statusbar_location : "bottom",
theme_advanced_resizing : true,

Vagrant+Docker+PHP環境で「session.save_path」指定時に、セッションファイルが空になるエラー
LINEと連携したテイクアウト事前注文システム徹底比較!
PHPで動画の撮影日を取得
FullCalendarでGoogleカレンダーのようなUIを実装
PHP Laravel5.2でmulti-auth(複数テーブルでの認証)を実装
PHP 正規表現でIPアドレス形式の文字列か判定
- MicrosoftVisualStudio CrystalReportの使い方 - 簡単帳票作成
- 落雷時に金属類を逆に付けておいたほうがいいんです!
- VB.NET DataGridViewの使い方 - 簡単グリッド
- VB.NET 宣言のまとめ - Public Protected Private Static などを正しく使う
- jQueryで簡単に吹き出しをポップアップ
- jQueryでフォームの入力チェック - ValidationEngine
- LINEと連携したテイクアウト事前注文システム徹底比較!
- VLCを使用して動画をMP4形式に変換
- PHP入門 掲示板を作成してみよう
- フォームでPOSTされない時の対処方法 - php.ini max_input_varsの設定

- Tokio
- 1986年7月1日生
- ITコンサルタント、エンジニアとして活動
